
Hello! Design Team Member Kate here. This year I'm on a mission to use the handmade card supplies I already own, like dies, stamps and embossing folders and I'm going to try to find ways to use them in as MANY ways as I can (not for just the one way I usually buy supplies for). Today I want to focus on using alphabet dies. This project is perfect for any size alphabet die you already own.
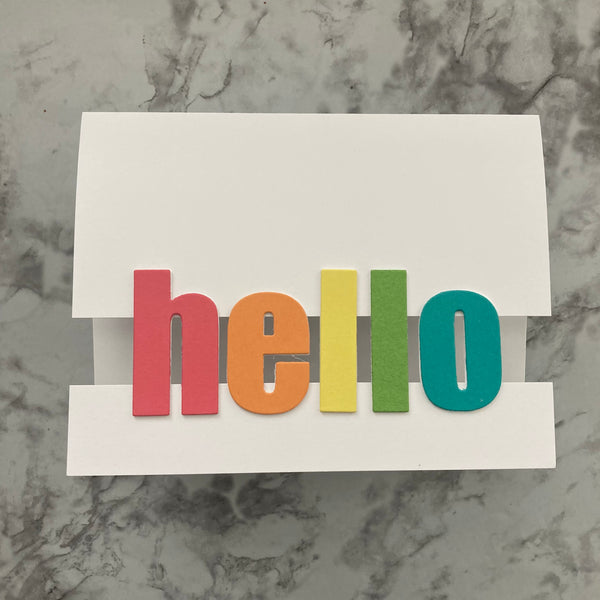
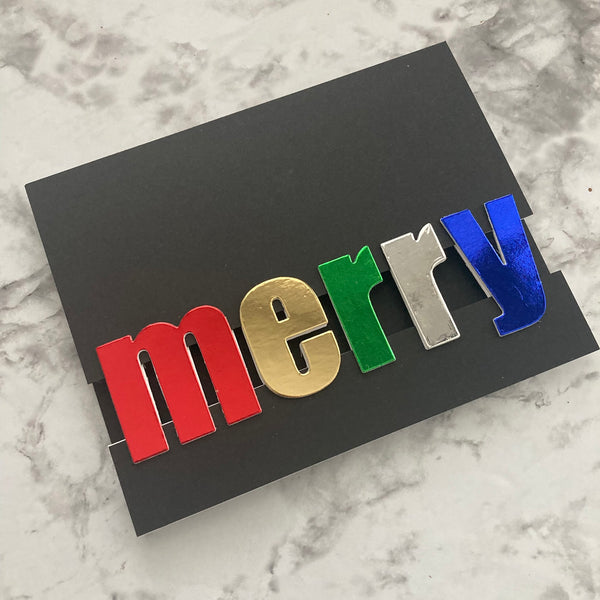
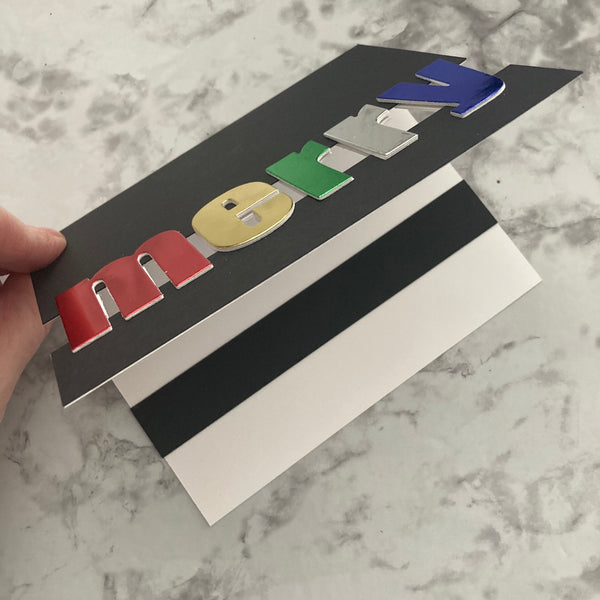
We are going to use those alphabet dies to make a bridge card. Don't own alphabet dies? Switch out the letters for stamped images, shapes, or stickers and still follow along with this bridge card tutorial.
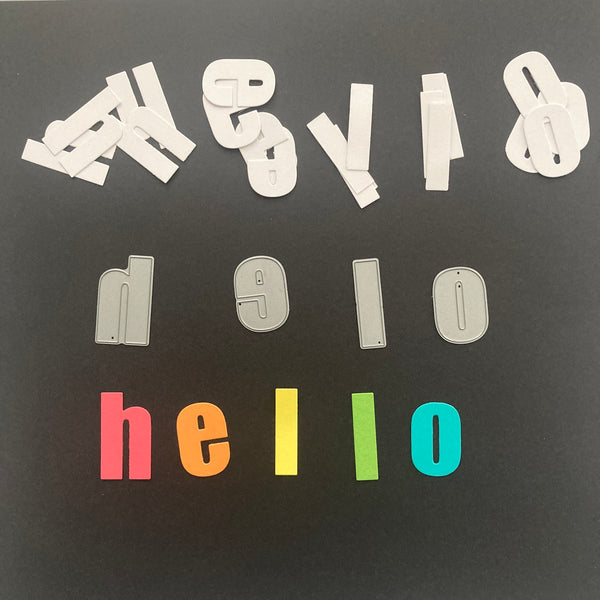
Decide on your word and cut four of each letter in a cardstock color that matches your card base (here, I used white). Cut a fifth letter set in your top color (solid cardstock, patterned, foil, glitter, etc.) Glue two of the white letters together and then attach your colored letter to the top. The other two will be used for the underside of the letters.

- Bazzill Card Shoppe Cardstock
- Mirri H Foil Cardstock
- Bold Alphabet die from Altenew
Here's another fun idea for using letter dies!
5 comments
Recent Blogs
Featured Blogs
Categories
3D Paper Projects
4th of july
Acetate
Adhesive
American Crafts Cardstock
Baby
Back to school
Banners
Bazzill
Birthday
BoBunny
Cake Topper
Card Making
Card Templates
Cardmaking
Cardstock
Carta Bella
Christmas
Core'dinations Cardstock
Crafts For Kids
Cricut
Cricut & Silhouette Crafting
Cutting Tips
DCWV
Deisgn Team Member Monica Rodriguez
Design Team Member Amanda Lace
Design Team Member An Pham
Design Team Member Annie Chinoy
Design Team Member April Gonzalez
Design Team Member Cherie Dalton
Design Team member Christi Steinbeck
Design Team Member Joselyn Sierra
Design Team Member Kandce Johnson
Design Team Member Kandice Johnson
Design Team Member Kate Deignan
Design Team member Kathleen Eifert
Design Team Member Manasa Vavilapalli
Design Team Member Michelle Price
Design Team Member Naomi Krush
Design Team Member Pam Giles
Die Cutting
Dimensional Paper Projects
DIY
Doodlebug Designs
Dreaming Tree
Easter
Echo Park
embellishments
Encore Cardstock
Envelopes
Fall
Father's Day
Foil Cardstock
Foil Quill
From the Owner Lynette
Genealogy
Gifts
Glama Translucent Vellum
Glitter Cardstock
Graduation
Halloween
hat
Holographic Cardstock
Masculine Crafts
Memento Ink
Mini Album
Mirri Cardstock
Mother's Day
mulberry paper
Neenah Classic Crest
Neenah Stardream
New Years Eve
Paper Craft Tips
Paper Flowers
Paper Party Decor
Paper Piecing
Paper Tags
Paper Weight
Patriotic
Patterned Paper
Princess
Rubber Stamping
Scrapbook Layout
Scrapbooking
Scraps
Shaker Card
Silhouette
Simple Stories
Sirio Cardstock
Skin Tone Cardstock
Spring
St. Patrick's Day
Stamping
Summer
SVG
Teacher Appreciation
Technical Info
Teens
Thanksgiving
Tutorial
Valentine's Day
Vellum
Video
Wedding
Winter
Woodgrain Paper


Great ideas… thank you! Do you have the sizes for the Barn Door stamp/die cuts card? I see lots of tutorials but the element card sizes are very vague. In advance, thank you for any assistance you can give me!
Lovely tutorial, gives me tons of ideas! TY for sharing!
Is there a video. I don’t understand but I love it.
Loved this idea and other ideas you share. Thank you so much
Great idea! Thanks for sharing this tutorial.
Leave a comment